s3からのファイルの取得
AWS SDKを使いs3からファイルを取得する方法についてメモ
require 'aws-sdk-core'

Aws.config[:region] = 'ap-northeast-1'
s3 = Aws::S3::Client.new(
    access_key_id:  ACCESS_KEY_ID,
    secret_access_key: SECRET_ACCESS_KEY
)

File.open('保存時のファイル名', 'w') do |file|
  s3.get_object({bucket: 'バケット名', key:'取得したいファイル名'}, target: file)
end
環境変数AWS_REGION、AWS_ACCESS_KEY_ID、AWS_SECRET_ACCESS_KEYを定義している場合initializeは
s3 = Aws::S3::Client.new
でOK。
GoogleMapのMapFragmentを取得した際にNullPointerExceptionが発生する場合の対処方法
概要
以下のようなコードでGoogleMapを表示しようとしたところNullPointerExceptionが発生した。
GoogleMap googleMap = ((SupportMapFragment) getSupportFragmentManager().findFragmentById(R.id.map)).getMap();
UiSettings uiSettings = googleMap.getUiSettings();
uiSettings.setZoomGesturesEnabled(true);
uiSettings.setScrollGesturesEnabled(true);
・
・
・
解決方法
OnMapReadyCallbackinterfaceを実装することで解決できた。
SupportMapFragment mapFragment = ((SupportMapFragment) getSupportFragmentManager().findFragmentById(R.id.map));
mapFragment.getMapAsync(new OnMapReadyCallback() {
    @Override
    public void onMapReady(GoogleMap googleMap) {
        UiSettings uiSettings = googleMap.getUiSettings();
        uiSettings.setZoomGesturesEnabled(true);
        uiSettings.setScrollGesturesEnabled(true);
        ・
        ・
        ・
    }
});
KotlinでAndroidアプリをビルドしてみる
最近Kotlinの話題を聞く事が多くなってきたので、Kotlinでプロジェクトを作成し、HelloWorldアプリをビルドするところまでやってみる。
公式サイトを見ながら環境を構築していく。
Kotlin Pluginのインストール
IntelliJ IDEA 15は最初からKotlin Pluginが入ってるらしい。バージョン15以前かAndroid Studioの場合、手動でKotlin Pluginをインストールする。
Androidプロジェクトの作成
AndroidプロジェクトでKotlinを使用するチュートリアルがあるので、それを見ながら進めてみる。
Getting started with Android and Kotlin
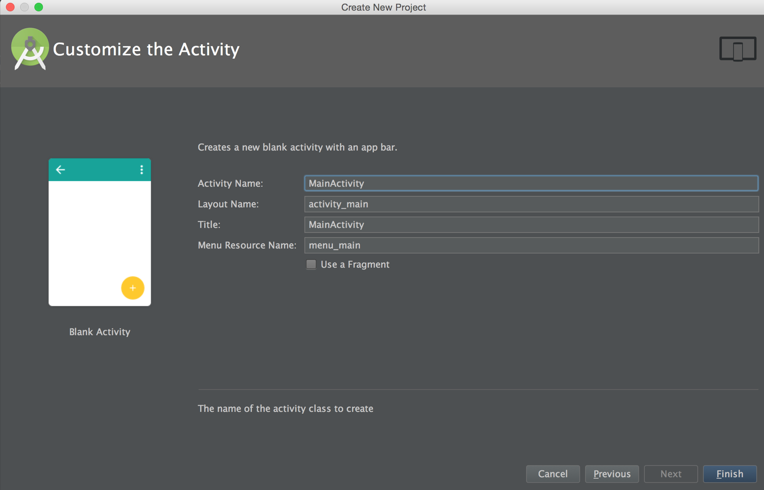
まず、通常のAndroidアプリと同様にプロジェクトを作成する。

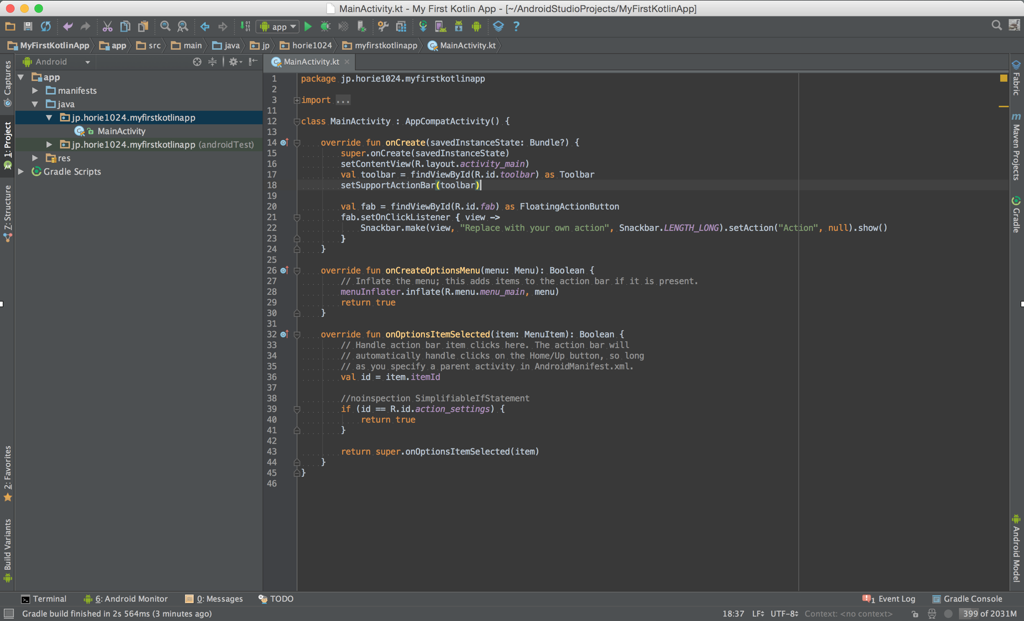
MainActivityを選択し、Find ActionをShortcutで開き Convert Java File to Kotlin Fileを実行する。ダイアログが表示されるが、cancelを取り敢えず選んだ。

JavaのコードがKotlinのコードに変換された!

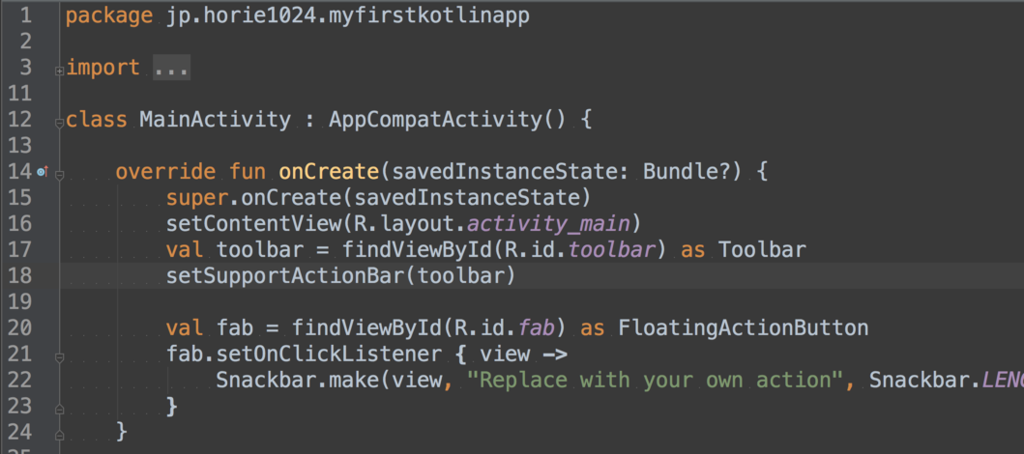
見づらいので拡大。ラムダ式すばらしい。

Kotlinの設定
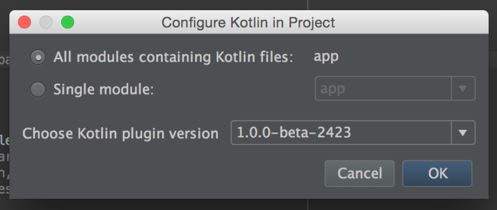
プロジェクトにKotlinの設定を追加する。再びFind ActionをShortcutで開き Configure Kotlin in the projectを実行する。すると以下のダイアログが表示されるので、OKをクリックする。

自動的にbuild.gradleが更新され、Kotlinの設定が追加されるので、Syncを実行しておく。
apply plugin: 'com.android.application'
apply plugin: 'kotlin-android'

android {…}

dependencies {
    compile fileTree(dir: 'libs', include: ['*.jar'])
    testCompile 'junit:junit:4.12'
    compile 'com.android.support:appcompat-v7:23.1.1'
    compile 'com.android.support:design:23.1.1'
    compile "org.jetbrains.kotlin:kotlin-stdlib:$kotlin_version"
}
buildscript {
    ext.kotlin_version = '1.0.0-beta-2423'
    repositories {
        mavenCentral()
    }
    dependencies {
        classpath "org.jetbrains.kotlin:kotlin-gradle-plugin:$kotlin_version"
    }
}
repositories {
    mavenCentral()
}
ビルド
通常のAndroid開発と同じようにビルドし、アプリを端末で立ち上げたが特に問題は無かった。

まとめ
Kotlinでサンプルアプリを作成し、HelloWorldを表示するまでやってみたが、特につまづく事なくKotlinを導入できてとも良かった。少しづつKotlinでアプリを書いてみようと思う。
参考
半年振りにBazelをインストール
概要
BazelがAndroidのビルドに対応してから試せていないので試したいが、Bazelは半年前にインストールしたままなので、新しくインストールし直してみる。
Bazelのインストール
http://bazel.io/docs/install.htmlを参考にインストールする。UbuntuのバージョンはTrusty (14.04 LTS)を使う。
コンテナの用意
DockerでUbuntuにコンテナを用意する。
$ docker run -i -t --dns=8.8.8.8 ubuntu /bin/bash
Java8のインストール
$ sudo apt-get install software-properties-common
$ sudo add-apt-repository ppa:webupd8team/java
$ sudo apt-get update
$ sudo apt-get install oracle-java8-installer
Bazelのインストール
Bazelのインストーラーをダウンロードしてくる。
$ wget https://github.com/bazelbuild/bazel/releases/download/0.1.1/bazel-0.1.1-installer-linux-x86_64.sh
実行権限を付与する。
$ chmod +x bazel-0.1.1-installer-linux-x86_64.sh
インストーラーを実行。
$ ./bazel-0.1.1-installer-linux-x86_64.sh --user
unzipが無いと言われるのでapt-getでインストールする。
$ apt-get install unzip
もう一度インストーラーを実行。
$ ./bazel-0.1.1-installer-linux-x86_64.sh --user
PATHを通す
$ export PATH="$PATH:$HOME/bin"
インストールできた。
$ bazel --version
Unknown Bazel startup option: '--version'.
  For more info, run 'blaze help startup_options'.
root@3160f1802c6b:~# bazel version
Build label: 0.1.1
Build target: bazel-out/local_linux-fastbuild/bin/src/main/java/bazel-main_deploy.jar
Build time: Thu Oct 15 20:15:14 2015 (1444940114)
Build timestamp: 1444940114
Build timestamp as int: 1444940114
半年前より簡単にインストールできた。
Bazelのインストール手順をDockerfileにまとめる
手動でBazelのインストールを行ったが、Dockerfileを書き自動化してみる。最終的に以下のようになった。
FROM ubuntu:14.04

ENV DEBIAN_FRONTEND noninteractive

# install Java8
RUN sudo apt-get -y install software-properties-common \
  && sudo add-apt-repository -y ppa:webupd8team/java \
  && sudo apt-get -y update \
  && sudo apt-get -y install oracle-java8-installer

# download bazel installer
RUN sudo apt-get -y install wget \
  && wget https://github.com/bazelbuild/bazel/releases/download/0.1.1/bazel-0.1.1-installer-linux-x86_64.sh

# install bazel
RUN sudo apt-get -y install unzip \
  && sudo chmod +x bazel-0.1.1-installer-linux-x86_64.sh \
  && sudo ./bazel-0.1.1-installer-linux-x86_64.sh --user \
  && export PATH="$PATH:$HOME/bin"
docker buildコマンドでimageをビルドする。
$ docker build -t horie1024/bazel:0.1.1 .
これでbazelがインストールされたimageを作成できる。
Java8のライセンス承諾でつまづく
デフォルトだとJava8のライセンスを承諾する際にdebconfが起動してしまい、docker buildに失敗した。環境変数DEBIAN_FRONTENDにnoninteractiveを設定するとdebconfを起動しないようになり回避できた。
$ ENV DEBIAN_FRONTEND noninteractive
参考
Dockerで起動したUbuntuコンテナからarchive.ubuntu.comの名前解決ができない場合の対処方法
Dockerで起動したUbuntuのコンテナで、apt-getを実行したところ以下のようなエラーが発生した。
$ apt-get install software-properties-common
・
・
・
0% [Connecting to archive.ubuntu.com]

Err http://archive.ubuntu.com/ubuntu/ trusty/main libroken18-heimdal amd64 1.6~git20131207+dfsg-1ubuntu1
  Could not resolve 'archive.ubuntu.com'
自分自身にPingを打ったところ届くので、hostの名前解決が出来てないようだった。
$ ping -w3 172.17.0.2
PING 172.17.0.2 (172.17.0.2) 56(84) bytes of data.
64 bytes from 172.17.0.2: icmp_seq=1 ttl=64 time=0.028 ms
64 bytes from 172.17.0.2: icmp_seq=2 ttl=64 time=0.031 ms
64 bytes from 172.17.0.2: icmp_seq=3 ttl=64 time=0.042 ms
64 bytes from 172.17.0.2: icmp_seq=4 ttl=64 time=0.047 ms

--- 172.17.0.2 ping statistics ---
4 packets transmitted, 4 received, 0% packet loss, time 2998ms
rtt min/avg/max/mdev = 0.028/0.037/0.047/0.007 ms
/etc/resolv.confをみてみると設定は以下のようになっていたので、nameserverの向先をGoogleのPublic DNS(8.8.8.8)に変える。
$ cat /etc/resolv.conf
nameserver 192.168.1.1
nameserver 192.168.1.228
nameserver 192.168.1.213
DNSサーバを変更するには、コンテナ作成時に--dnsオプションをつける必要がある。
$ docker run -i -t --name=test --dns=8.8.8.8 ubuntu /bin/bash
作成したコンテナの/etc/resolv.confをみてみると、DNSサーバは--dnsで指定したIPとなっている。
$ cat /etc/resolv.conf
nameserver 8.8.8.8
この状態でもう一度apt-getを試すと上手くいった。
deprecatesになったBoot2DockerをDocker MachineにMigrationする
たまたまDockerの公式サイトをみたところ以下のような注意書きが。
Note: This release of Docker deprecates the Boot2Docker command line in favor of Docker Machine. Use the Docker Toolbox to install Docker Machine as well as the other Docker tools.
どうやらBoot2Dockerは、deprecatesになったようだ・・。
今はBoot2Dockerに代わってDocker Machineを使用するようなので、公式サイトのBoot2DockerからのMigration方法を参考にMigrationする。
Docker Machineをインストールする
Docker Toolboxをダウンロードし、インストールする。インストールを進めていくとDocker Quickstart TerminalまたはKitematicの選択を求められるが、どちらも選択しない。これでdocker-machineコマンドを利用できるようになる。
Boot2DockerからDocker MachineへのMigration
Boot2DockerからのMigration方法に書いてある通り、以下のコマンドを実行する。
$ docker-machine create -d virtualbox --virtualbox-import-boot2docker-vm boot2docker-vm docker-vm
docker-machneのコマンドを叩き、使用できるvmを表示する。
$ docker-machine ls
NAME        ACTIVE   DRIVER       STATE     URL                         SWARM
docker-vm   *        virtualbox   Running   tcp://192.168.1.1:1234
$ docker-machine env docker-vm
export DOCKER_TLS_VERIFY="1"
export DOCKER_HOST="tcp://192.168.1.1:1234"
export DOCKER_CERT_PATH="/Users/horie/.docker/machine/machines/docker-vm"
export DOCKER_MACHINE_NAME="docker-vm"
# Run this command to configure your shell:
# eval "$(docker-machine env docker-vm)"
eval "$(docker-machine env docker-vm)"を実行し、環境変数を定義する。これでdocker clientからdocker-vmを利用してdocker containerを作成できるようになった。毎回↑のコマンドを入力するのは面倒なので、.bashrcや.zshrcなどのshellの設定ファイルにeval "$(docker-machine env docker-vm)"を追加しておく。
hello-world containerを起動する
$ docker run hello-world
Hello from Docker.
This message shows that your installation appears to be working correctly.

To generate this message, Docker took the following steps:
 1. The Docker client contacted the Docker daemon.
 2. The Docker daemon pulled the "hello-world" image from the Docker Hub.
    (Assuming it was not already locally available.)
 3. The Docker daemon created a new container from that image which runs the
    executable that produces the output you are currently reading.
 4. The Docker daemon streamed that output to the Docker client, which sent it
    to your terminal.

To try something more ambitious, you can run an Ubuntu container with:
 $ docker run -it ubuntu bash

For more examples and ideas, visit:
 http://docs.docker.com/userguide/
問題なさそう。